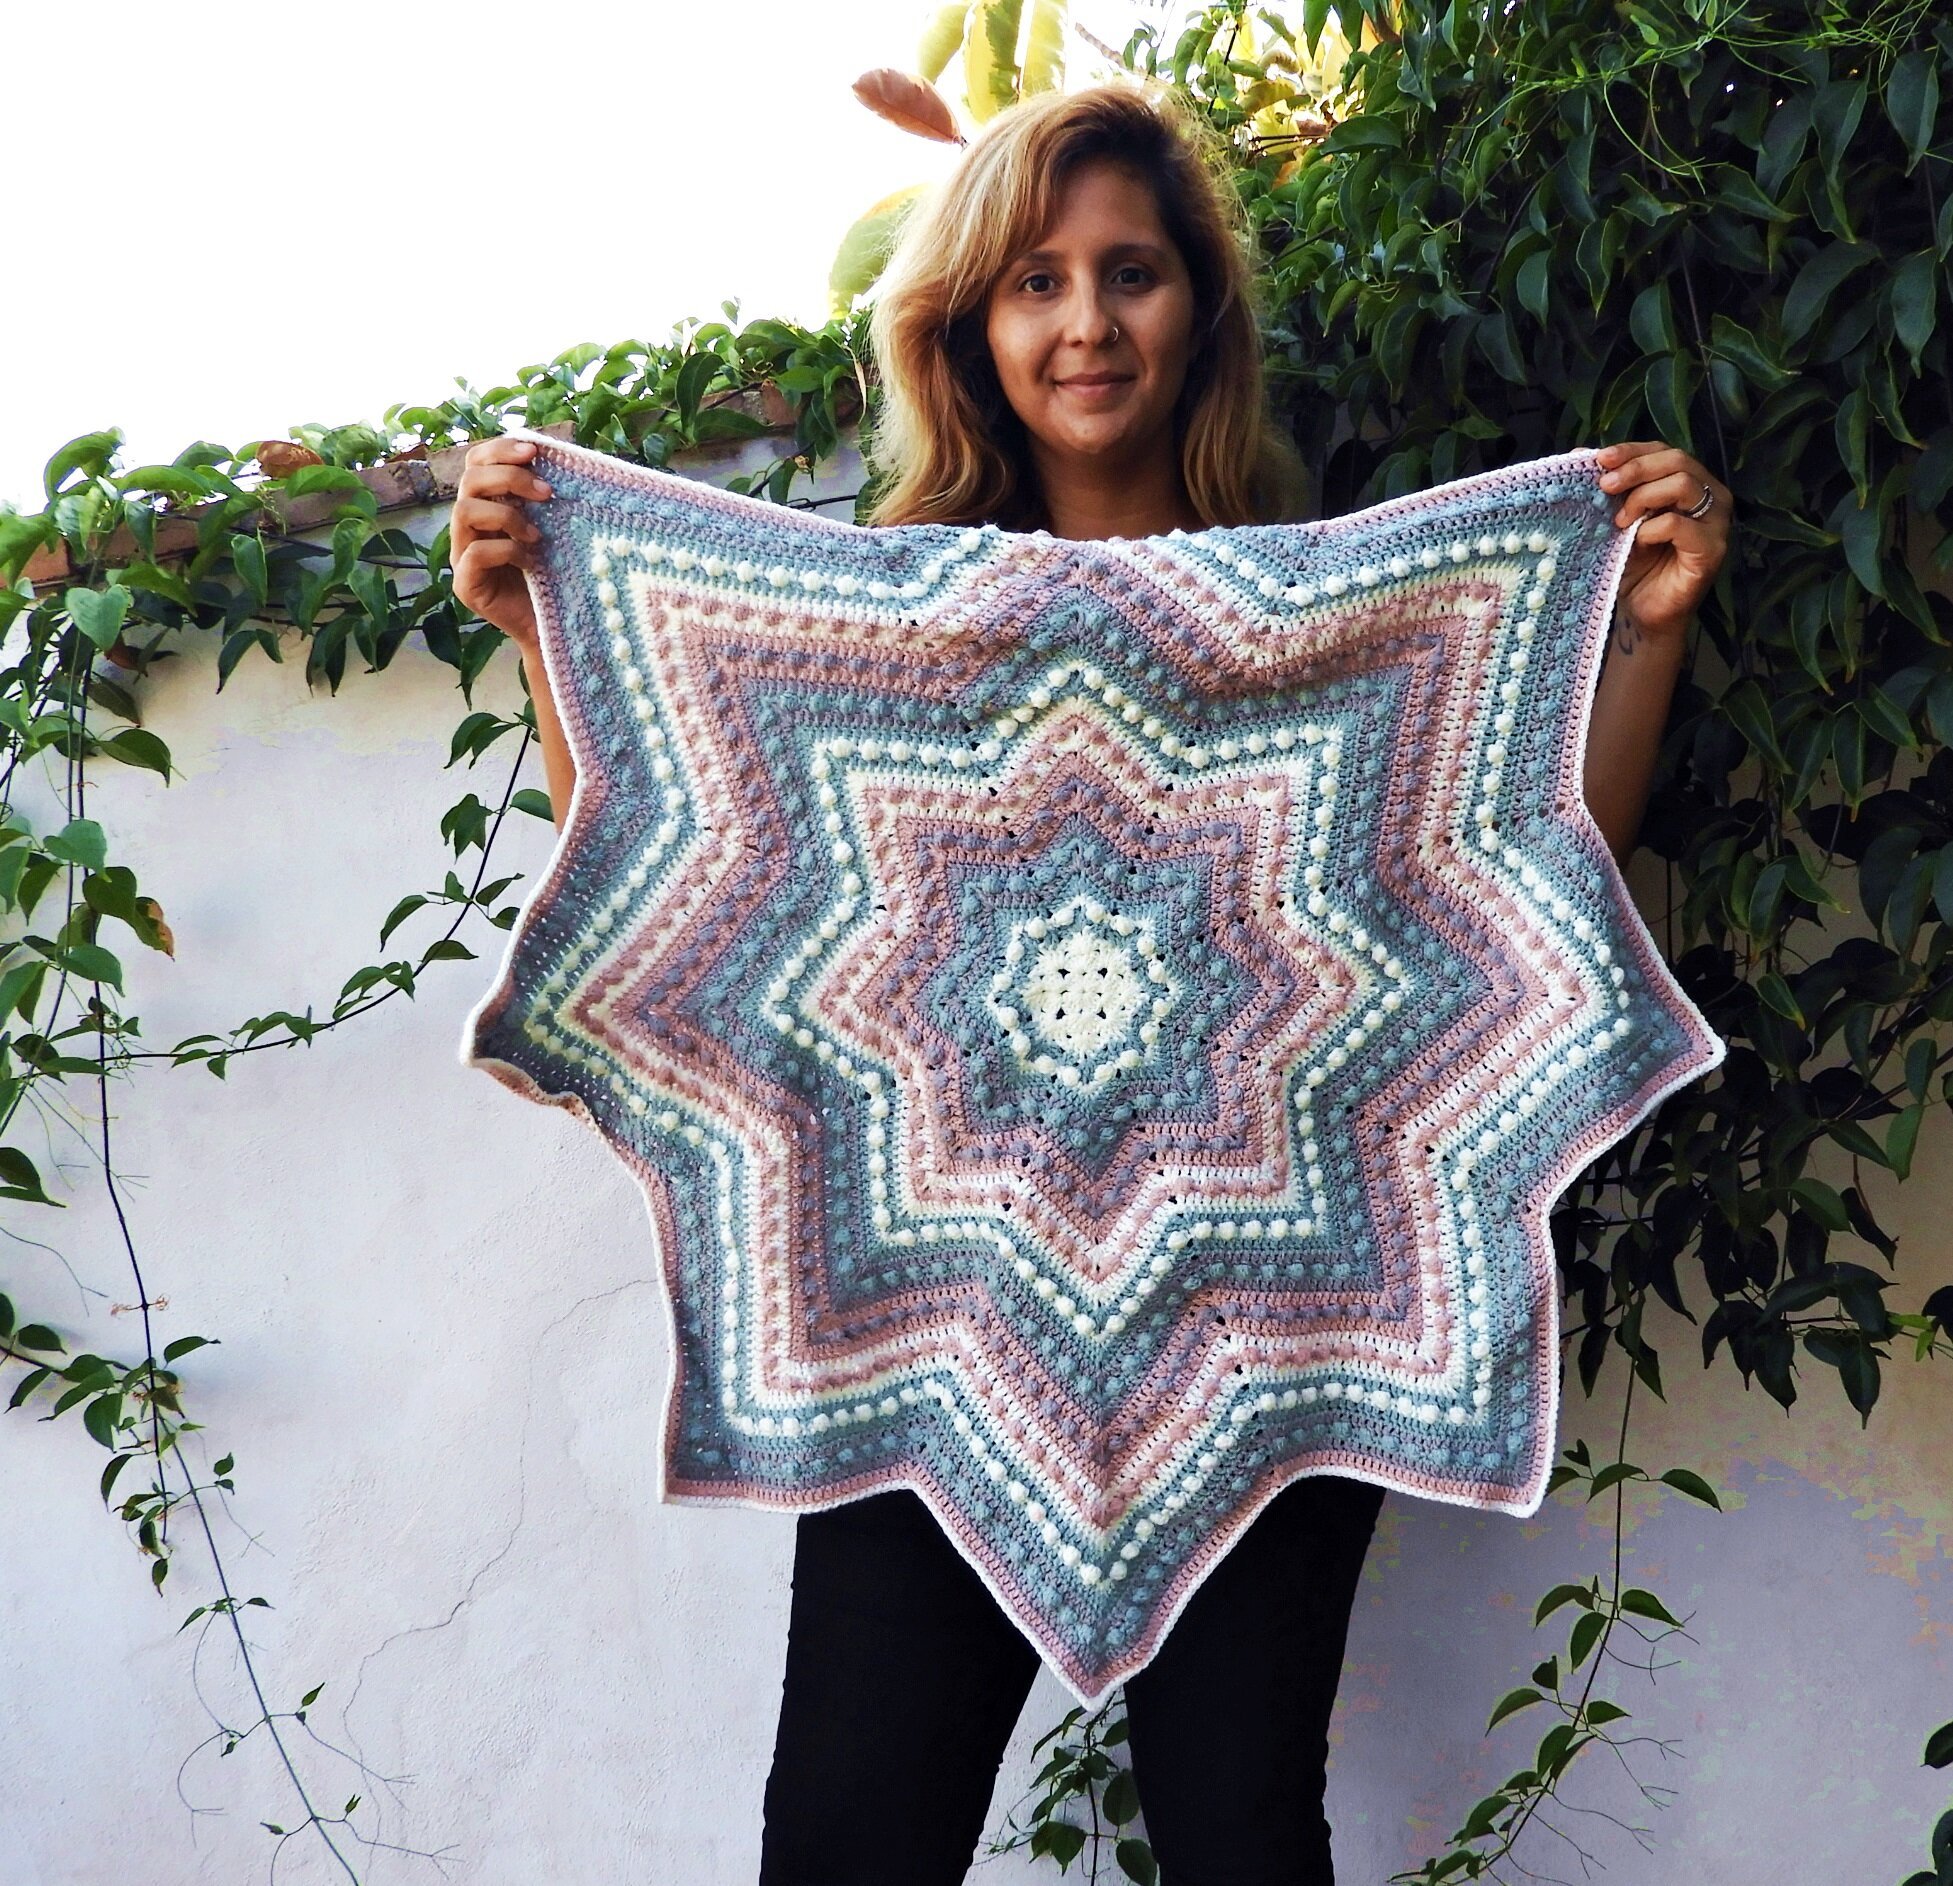
Starlet Baby Blanket
When your friends start having babies, it is always super exciting. Especially when you don’t have any children, like myself, because you get to make all of the little pretty things that are baby sized that you’ve longingly stared at on Instagram!
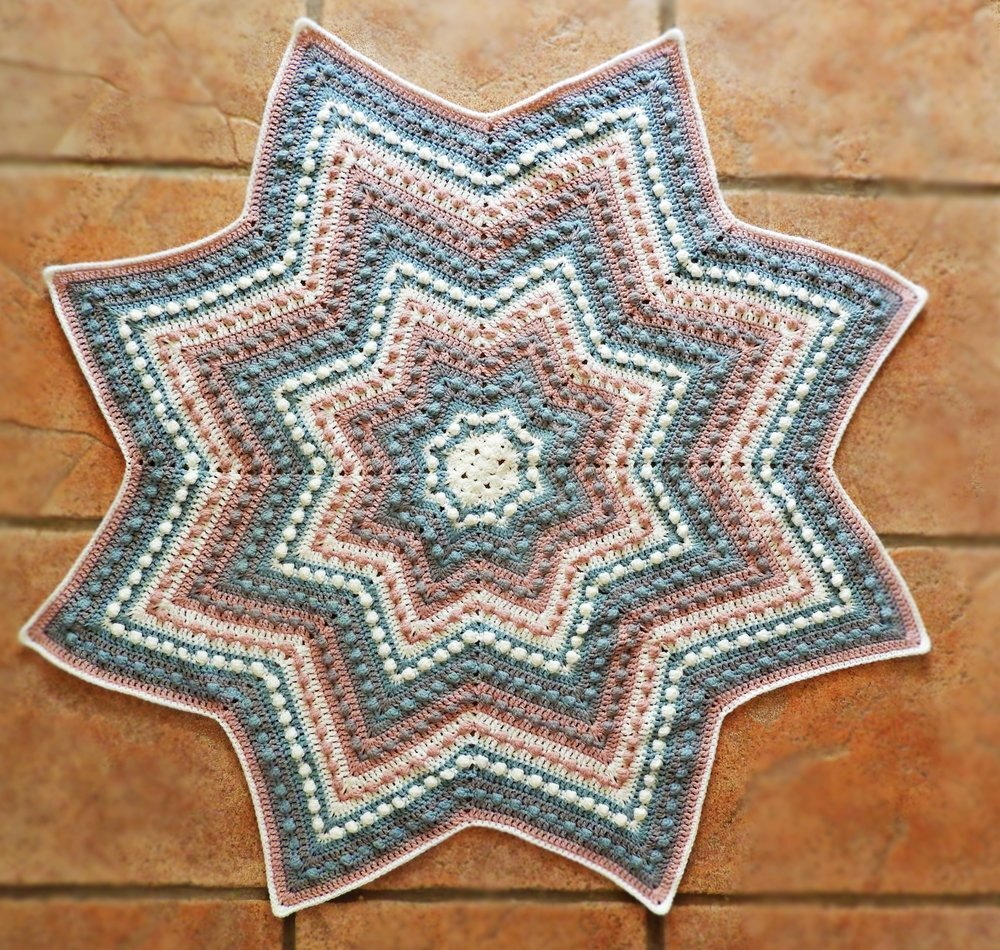
The Starlet Blanket was made to be the perfect baby gift for someone that you love, or for your own little one, of course!
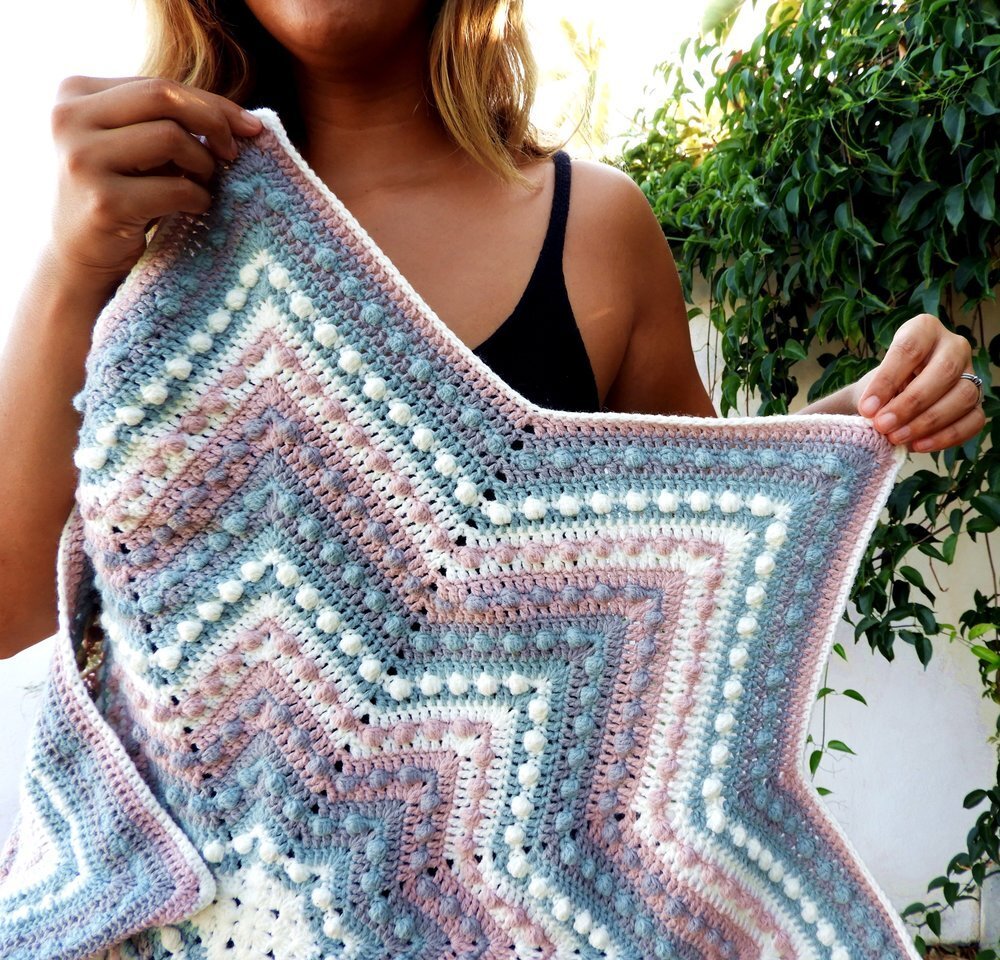
The star shape is fun and modern and it can be easily wrapped around a baby on a stroller or as a bed spread. The texture of the Bobble stitches add an extra stimulus for the baby and makes it extra soft and beautiful.
It’s a beginner level blanket that can be made with any yarn or hook and as big or small as you want it. For mine I used Schachenmayr Suavel. It’s a fine yarn that I had to hold double, but I chose it because it’s made specifically for babies. It’s 100% acrylic, which means no danger of exposing babies to allergens at a young age, and it can be machine washed and dried! So, it’s perfect for all that baby gunk that you lovely mothers must deal with.
The blanket starts in the middle and continues to be worked in rounds. After the center shape, the following rows are repeated. There are 2 rows of dc and 1 row of sc and bobbles in between the dc rows. You can repeat the shape until the blanket reaches your desired size. The pattern is written for 3 colors (A, B, and C), but you can use as many colors as you want.
I have included the complete written pattern in this post, but you can find the downloadable PDF complete with photo tutorial and detailed charts HERE. Or if you’re in Canada, you can find it HERE.
I hope you enjoy the pattern and please, make sure you tag me on social media so that I can see you work!
Starlet Blanket Crochet Pattern
Download PDF HERE. Or if you’re in Canada, you can find it HERE.
Materials
YARN: Sample used approximately 800 m of Schachenmayr Suavel, held double, in 4 different colors (approximately 200 m of each), 100% Acrylic.
Depending on your desired blanket size and thickness, you can use any other kind of yarn, from fingering to Aran yarn.
HOOKS: sample used 4.5 mm, but whatever hook is recommended for your yarn weight will work.
NOTIONS: tapestry needle.
Gauge
For this project, gauge is not so important. But remember that using a bigger hook will make your fabric looser and less stiff than with a smaller hook. It all depends on the effect that you want to achieve and the material that you choose to use.
Sizes + measurements
This pattern comes in 1 universal size that can be extended to any desired size.
Special Techniques
Bobble Stitch: 3 double crochet cluster (Bobble Stitch)
Start 3dc on the same st, finish them all together as one.
Magic Circle: If you need help with this technique, here’s the link to a good tutorial by Hopeful Honey.
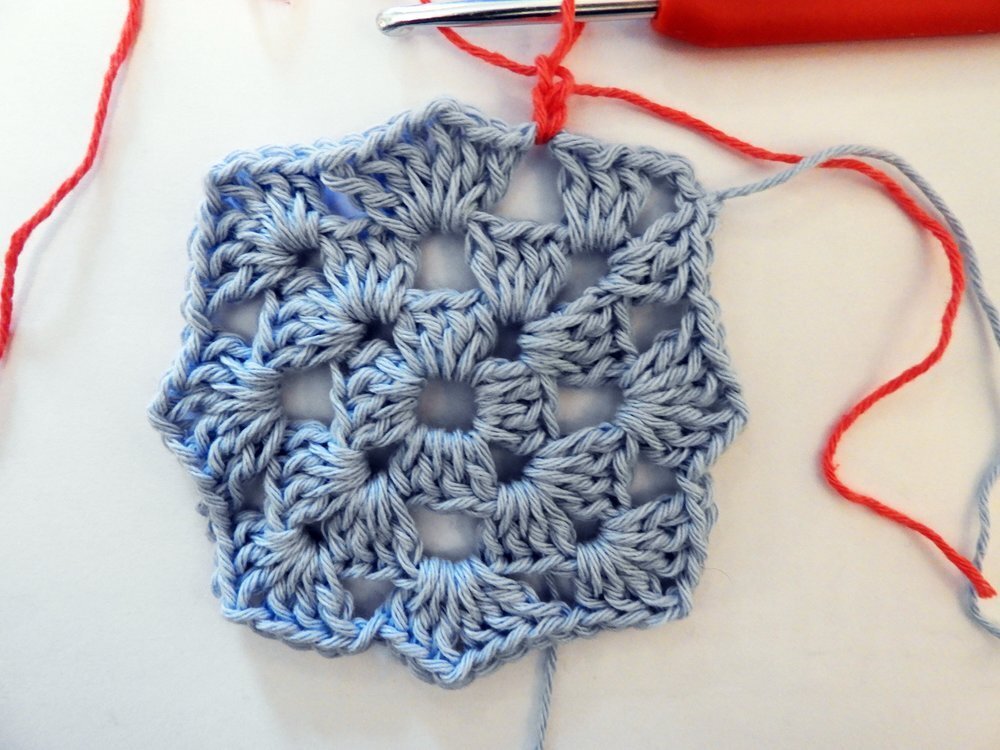
Center
With CA.
ROW 1: Start with a magic circle (alternatively, ch4, join to the 1st ch with a slst and work in the middle of the ch4 circle), ch4, *dc4, ch1, rep from * 3 times, dc3, (tighten the magic circle here) slst in the 3rd ch.
ROW 2: Slst on the next chsp, ch4, dc4 in the ch1sp, *ch1, dc4 in the next ch1sp, ch1, dc4 in the same ch1sp, rep from * 3 times, ch1, dc3 in the 1st ch1sp that you worked, slst in the 3rd ch.
ROW 3: Slst on the next chsp, ch4, dc3 in the ch1sp, *dc3 in the next ch1sp, ch1, dc3 in the same ch1sp, rep from * 7 times, dc2 in the 1st ch1sp that you worked, slst in the 3rd ch, fasten off and cut.
Outside rounds
Attach CB to the 1st dc of a corner cluster.
ROUND 1:(with CB), Ch2 (never counts as a dc), sk st where you slst, *dc in next 2 sts, dc 2 in ch1sp, ch1, dc2 in same ch1sp, dc in next 2 sts, sk 2 sts, rep from * around, slst in 1st st with CA (CB can just hang loose until Round 3)
ROUND 2: (with CA) Ch1, sk st where you slst, *sc1, 1 Bobble st, sc1, sc 5 in ch1sp, sc1, 1 Bobble st, sc1, sk2, rep from * around, slst in 1st st with CB, cut the prev color leaving a tail to weave in.
ROUND 3: (with CB) Ch2, sk st where you slst, *dc to before the middle sc from the 5 sc corner, dc 2 in the next st, ch1, dc2 in the same st, dc to 1 before the end of the corner cluster, sk 2 sts, rep from * around, slst in 1st st with CC (CB can just hang loose until Round 5)
ROUND 4: (with CC) Ch2, sk st where you slst, *dc to ch1sp, dc 2 in ch1sp, ch1, dc2 in the ch1sp, dc to 1 before the end of corner cluster, sk 2 sts, rep from * around, slst in 1st st with CB (CC can just hang loose until Round 6).
ROUND 5: (with CB) Ch1, sk st where you slst, *(sc1, 1 Bobble st, sc1) rep to next ch1sp, sc 5 in ch1sp, (sc1, 1 Bobble st, sc1) rep to 1 before the end of cluster, sk2, rep from * around, slst in 1st st with CC, cut the prev color leaving a tail to weave in.
ROUND 6: (with CC) Ch2, sk st where you slst, *dc to before the middle sc from the 5 sc corner, dc 2 in the next st, ch1, dc2 in the same st, dc to 1 before the end of the cluster, sk 2 sts, rep from * around, slst in 1st st with CA (CC can just hang loose until Round 8).
ROUND 7: (with CA)Repeat Row 4, but change to CC at the end.
ROUND 8: (with CC) Repeat Row 5, but change to CA at the end.
ROUND 9: (with CA) Repeat Row 6, but change to CB at the end.
Continue repeating Rounds 4, 5 and 6, changing colors as you go, making the Bobble st rounds in the color previously used. You can carry the yarn between dc and cluster rows of the same color, but you should cut it when you will use more than one color in between. If you only use 2 colors, you won’t need to cut the yarn at any time. Instead you can carry it in the back of your work.
Edging
When your blanket reaches your desired size, do the following with the color of your choice.
Ch1, sk1, *sc to ch1sp, sc5 in ch1sp, sc to 1 before the end of cluster, sk2, rep from * around, slst in the 1st st.